| Version 10 (modified by runom, 16 years ago) (diff) |
|---|
Creating a Planet for Orxonox
This tutorial will show you how to create a planet with procedurale textures for Orxonox.
1st Step
First we have to create an actual mesh for our planet. Most often people use UV-spheres for this purpose, however unsightly texture distortions occur, especially around the poles, because of the UV unwrap. Those distortions can be prevented by using a cube and moving the vertexes so that they lie on the surface of a sphere. That way there are only very minor distortions. Confused yet? Good. I'll show you now how to all that, step by step:
2nd Step
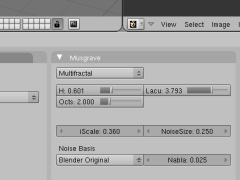
Now, before we go any further, we'll create the texture.
Step 3
Now we'll unwrap our model, so we can then apply the texture according to UV coordinates.
| The model will be unwrapped and the result in the UV/Image Editor should look like this: | 
|
| You now need to distribute the vertexes evenly so the whole image is used and no space wasted. | 
|
3rd Step
In the next step we'll increase the vertexcount of the cube and map it to a sphere.
You can download a template planet blend file here (you need the template.tga too):
All you have to do is change the textures the way you want and bake them to a file.
4th Step
Exporting Meshes is explained properly in this wiki-article: https://www.orxonox.net/wiki/BlenderExport
Attachments (18)
- cube1.png (15.5 KB) - added by runom 16 years ago.
- markseam.png (2.3 KB) - added by runom 16 years ago.
- faceselect.png (6.3 KB) - added by runom 16 years ago.
- seamsselected.png (11.2 KB) - added by runom 16 years ago.
- texselect.png (7.7 KB) - added by runom 16 years ago.
- settings.png (12.3 KB) - added by runom 16 years ago.
- colourselect.png (18.4 KB) - added by runom 16 years ago.
- bake.png (8.6 KB) - added by runom 16 years ago.
- subdivide.png (5.1 KB) - added by runom 16 years ago.
- tosphere.png (6.6 KB) - added by runom 16 years ago.
- cursor.png (2.8 KB) - added by runom 16 years ago.
- resize.png (37.8 KB) - added by runom 16 years ago.
- newimagesett.png (7.5 KB) - added by runom 16 years ago.
- uveditnewimage.png (12.7 KB) - added by runom 16 years ago.
- unwrapped.2.png (73.4 KB) - added by runom 16 years ago.
- baked.png (78.7 KB) - added by runom 16 years ago.
- saveimage.png (12.3 KB) - added by runom 16 years ago.
- planetTemplate.blend (294.1 KB) - added by runom 16 years ago.
Download all attachments as: .zip


