| Version 6 (modified by runom, 16 years ago) (diff) |
|---|
Creating a Planet for Orxonox
This tutorial will show you how to create a planet with procedurale textures for Orxonox.
1st Step
First we have to create an actual mesh for our planet. Most often people use UV-spheres for this purpose, however unsightly texture distortions occur, especially around the poles, because of the UV unwrap. Those distortions can be prevented by using a cube and moving the vertexes so that they lie on the surface of a sphere. That way there are only very minor distortions. Confused yet? Good. I'll show you now how to all that, step by step:
2nd Step
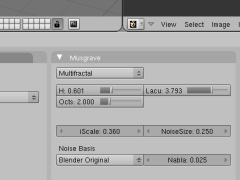
Now before we go any further with the model, we'll create the texture and bake it to an image. That way we can later change the model but keep the original UV coordinates and mapping.
3rd Step
In the next step we'll increase the vertexcount of the cube and map it to a sphere.
| Press F9 and TAB to get into edit mode. Click on Subdive in order to increase the vertex count, about 1538 vertexes should be enough | test |
| Next make sure that your space cursor lies in the origin. If not, just press "SHIFT + C" to reset it. | test |
| Click on To Sphere, make sure it's on 100 and press ok. | test |
| Now we need to resize the sphere's radius to 1 so that the scaling in-game works properly. Make sure the whole sphere is selected and press S. Scale it to 1. | test |
4th Step
Exporting Meshes is explained properly in this wiki-article: https://www.orxonox.net/wiki/BlenderExport
Attachments (18)
- cube1.png (15.5 KB) - added by runom 16 years ago.
- markseam.png (2.3 KB) - added by runom 16 years ago.
- faceselect.png (6.3 KB) - added by runom 16 years ago.
- seamsselected.png (11.2 KB) - added by runom 16 years ago.
- texselect.png (7.7 KB) - added by runom 16 years ago.
- settings.png (12.3 KB) - added by runom 16 years ago.
- colourselect.png (18.4 KB) - added by runom 16 years ago.
- bake.png (8.6 KB) - added by runom 16 years ago.
- subdivide.png (5.1 KB) - added by runom 16 years ago.
- tosphere.png (6.6 KB) - added by runom 16 years ago.
- cursor.png (2.8 KB) - added by runom 16 years ago.
- resize.png (37.8 KB) - added by runom 16 years ago.
- newimagesett.png (7.5 KB) - added by runom 16 years ago.
- uveditnewimage.png (12.7 KB) - added by runom 16 years ago.
- unwrapped.2.png (73.4 KB) - added by runom 16 years ago.
- baked.png (78.7 KB) - added by runom 16 years ago.
- saveimage.png (12.3 KB) - added by runom 16 years ago.
- planetTemplate.blend (294.1 KB) - added by runom 16 years ago.
Download all attachments as: .zip


